
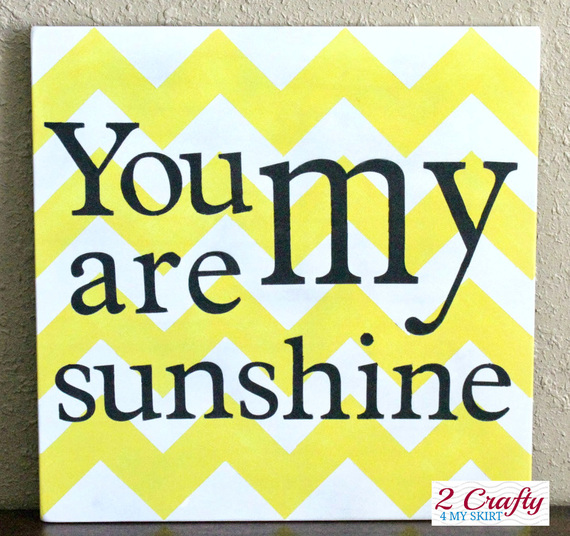
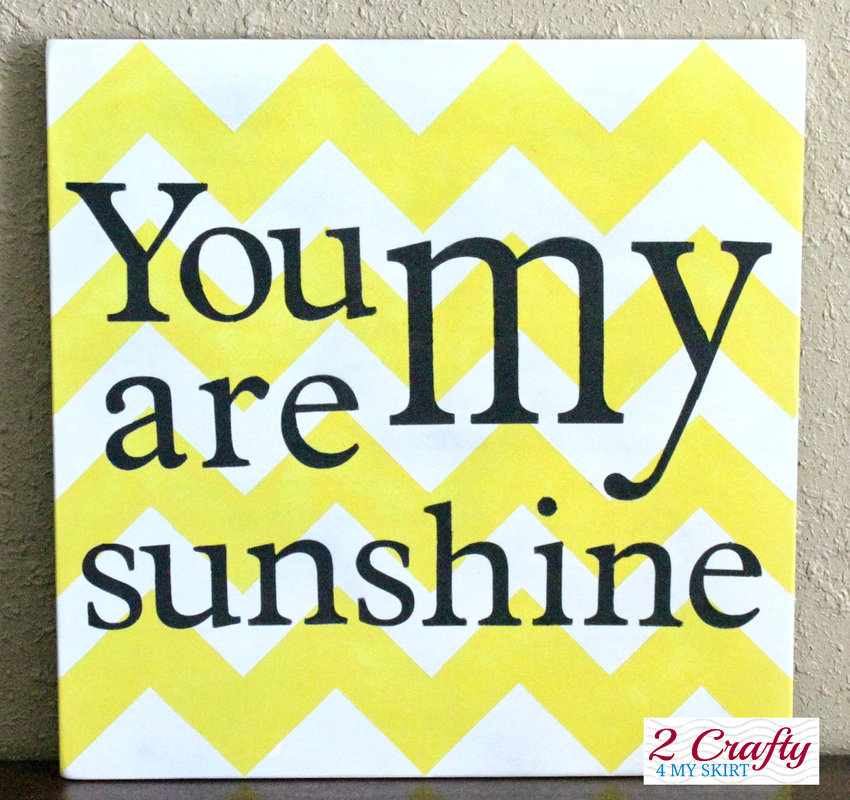
I used this method to make my popular "You Are My Sunshine" sign.
Before we get started I want to let you know that not only do I love to share tutorials, I am also a Handmade Shop owner. You can shop all of my items right here on my site. Visit my SHOP to browse items!
This measuring method works for a square board, but similar ideas could be used for various sizes.
Grab a measuring tape and make a small pencil mark at the middle of the board, and another mark on each side between your mark and the end of the board. Do this on all four sides of your board.
Depending on the size of your board and tape you use, you may need to divide it in half more times than this.
I built a sign that was 17"x17" and 1.41" Frog tape.
I basically did this method in my head.
You could make a piece of paper the same size as your sign and draw it out if you need to.
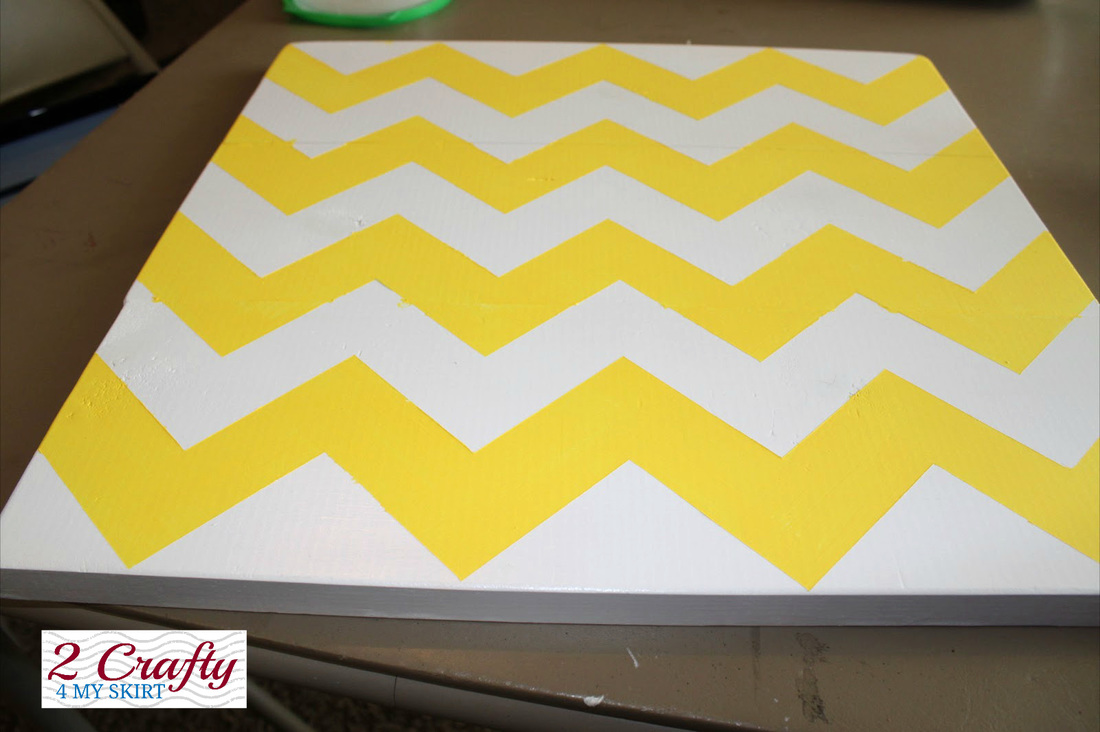
The first version of the "You are my Sunshine" sign that I made I did stained with yellow chevron, and white words. I later decided to make it with white and yellow stripes, and black words so that that words would pop more. I wanted to point out that most of my photos shown in this tutorial are from the first sign I made. You can see the natural wood in the pictures, but if you want to make a sign as shown, your first step would be to paint your entire sign white, and then start taping off your chevron.
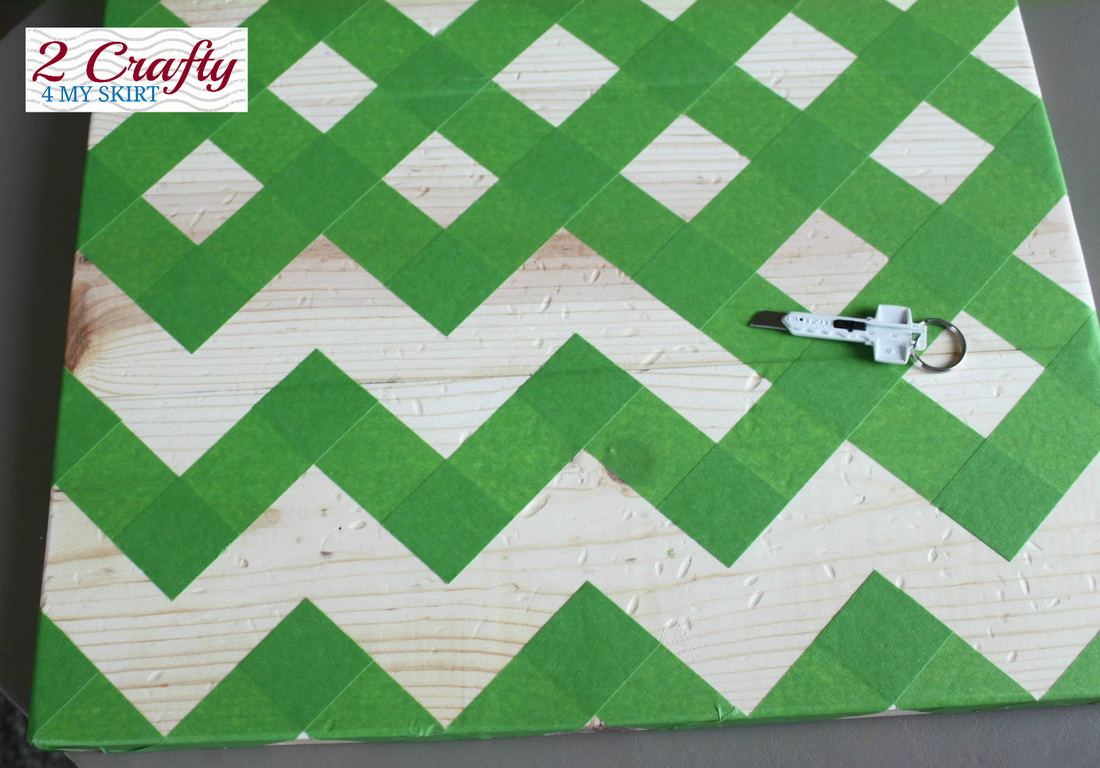
Once you have your marks added, start taping. Use your marks for a guide of where to put your tape.
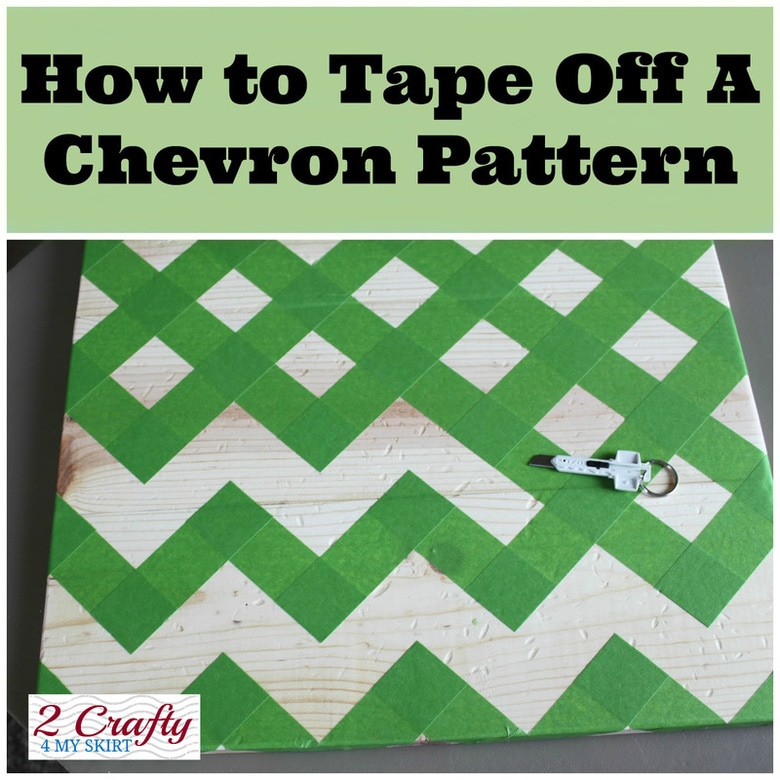
I'm not going to lie, it can be tricky figuring how where the tape goes. I have made dozens of these signs, and I still have to think twice about each piece of tape. Looking at this picture while you tape yours off will help.
I'm not going to lie, it can be tricky figuring how where the tape goes. I have made dozens of these signs, and I still have to think twice about each piece of tape. Looking at this picture while you tape yours off will help.
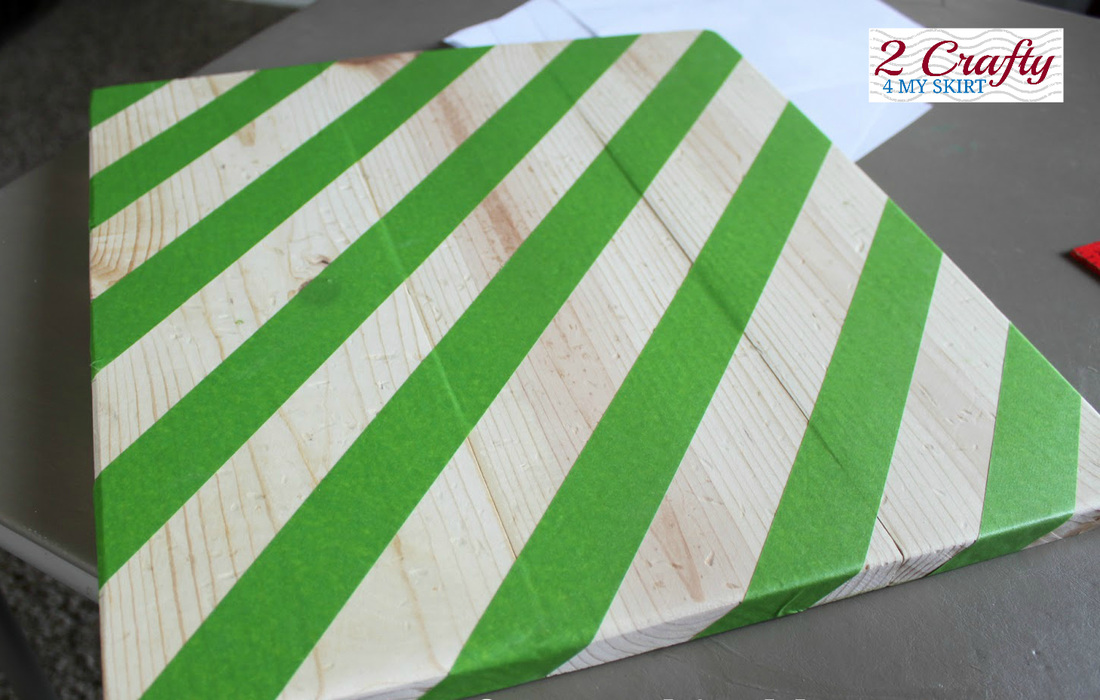
Then tape off the other direction matching it up with the tape you have already put on. This direction is even more tricky, but YOU CAN DO IT!
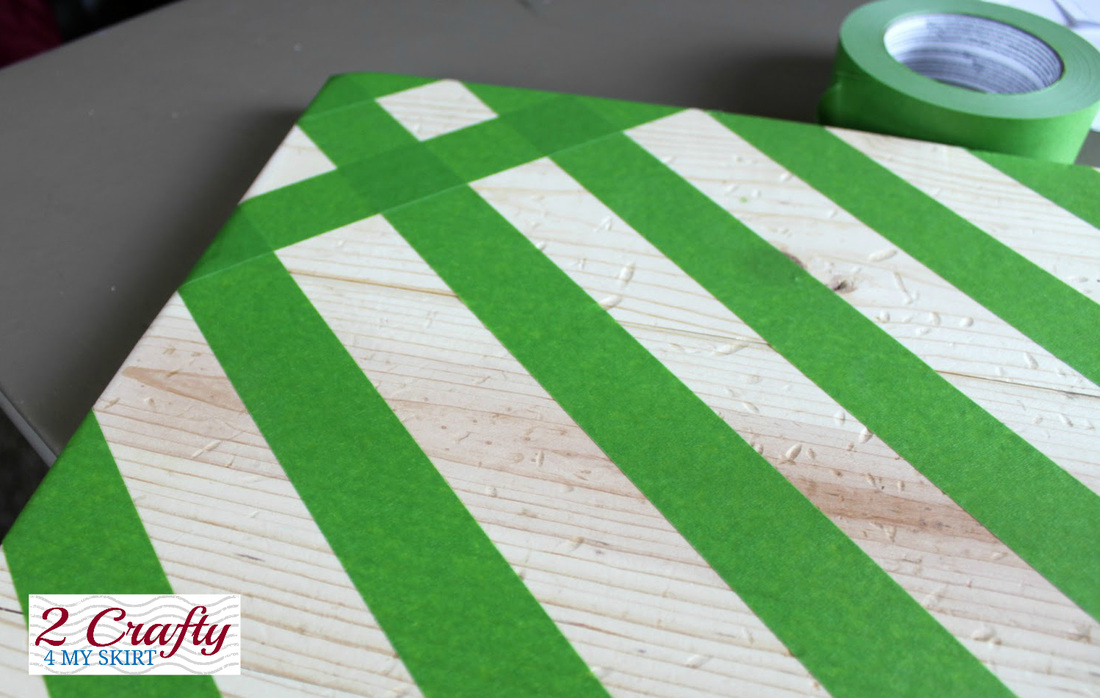
Your board should look like this. The first couple of times I made these signs I looked at this picture to help me get the second layer of tape in the right places.
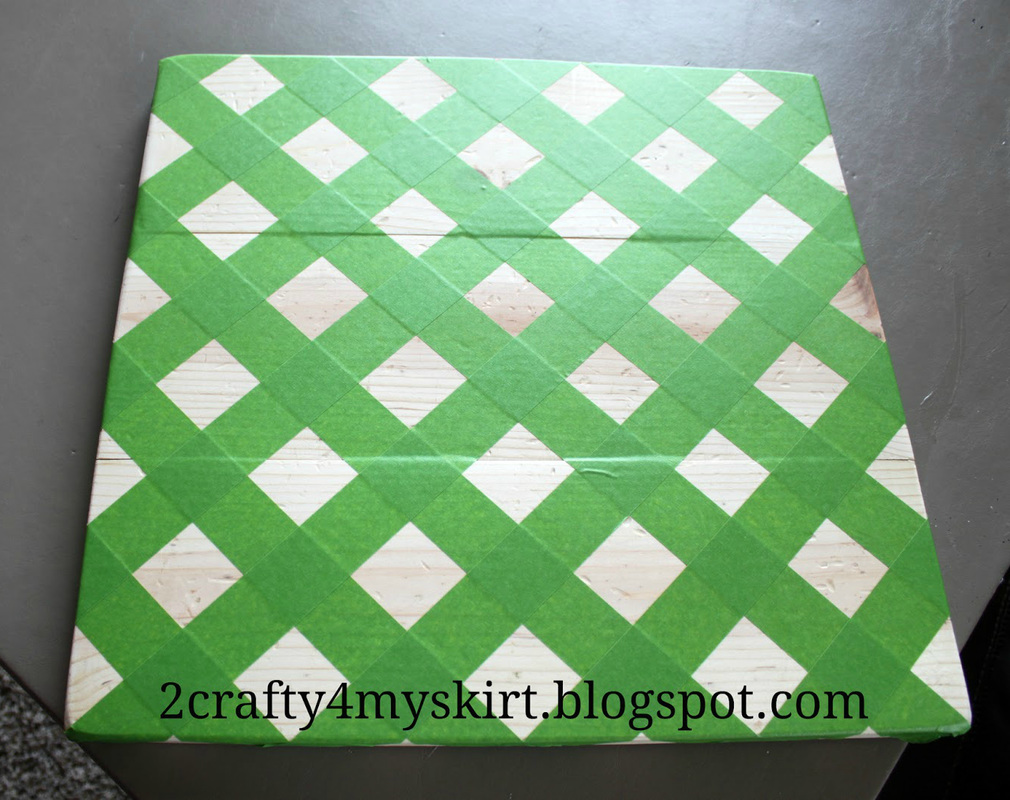
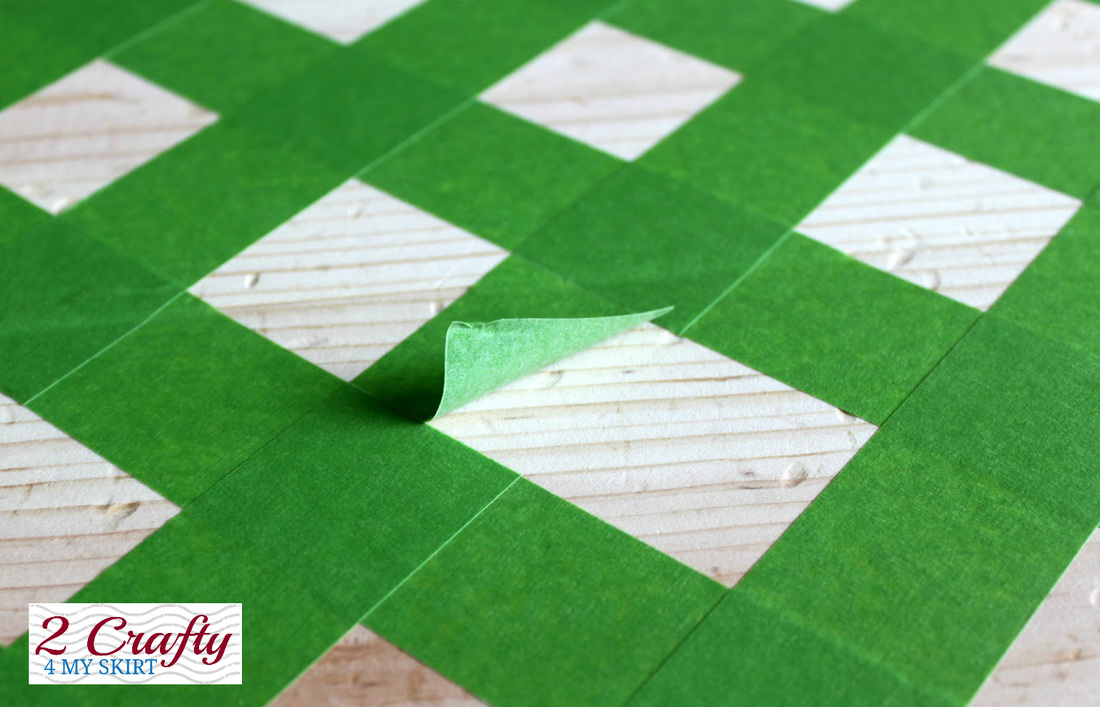
Next take a razor blade and start cutting out tape pieces to make your chevron stripes. You can take a pencil and draw a chevron line on top of the tape that will be staying. This will help you figure out which pieces of tape to cut off.
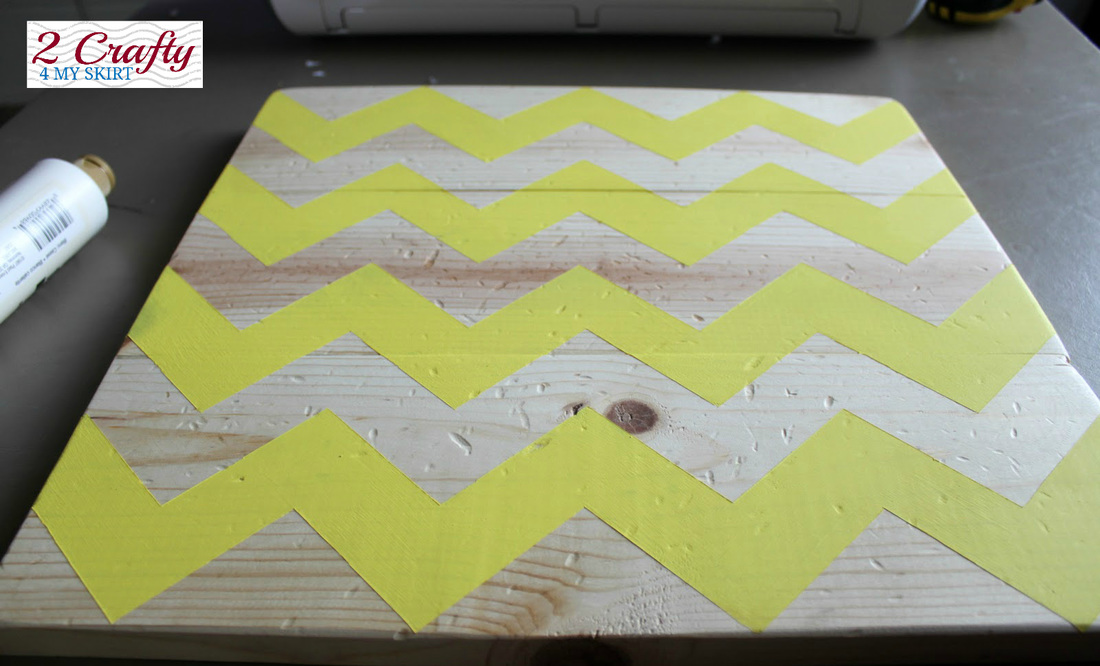
Now you will have a perfectly taped off Chevron Pattern!
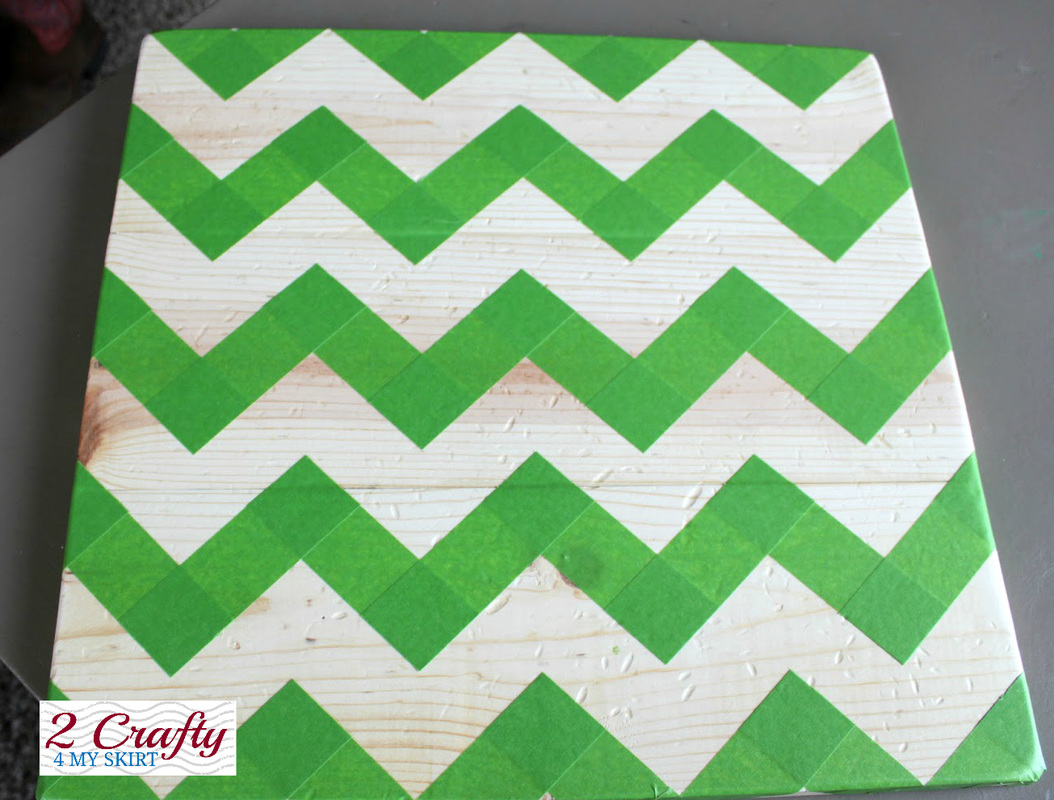
I like to continue the chevron on the sides also. When painting it works best to use as little paint as possible to keep paint from bleeding under the tape. Do two or three coats if needed. If you used a base coat color, you can also paint that color over your taped off pattern before painting your chevron color. This will seal the edges of the tape and prevent leakage.
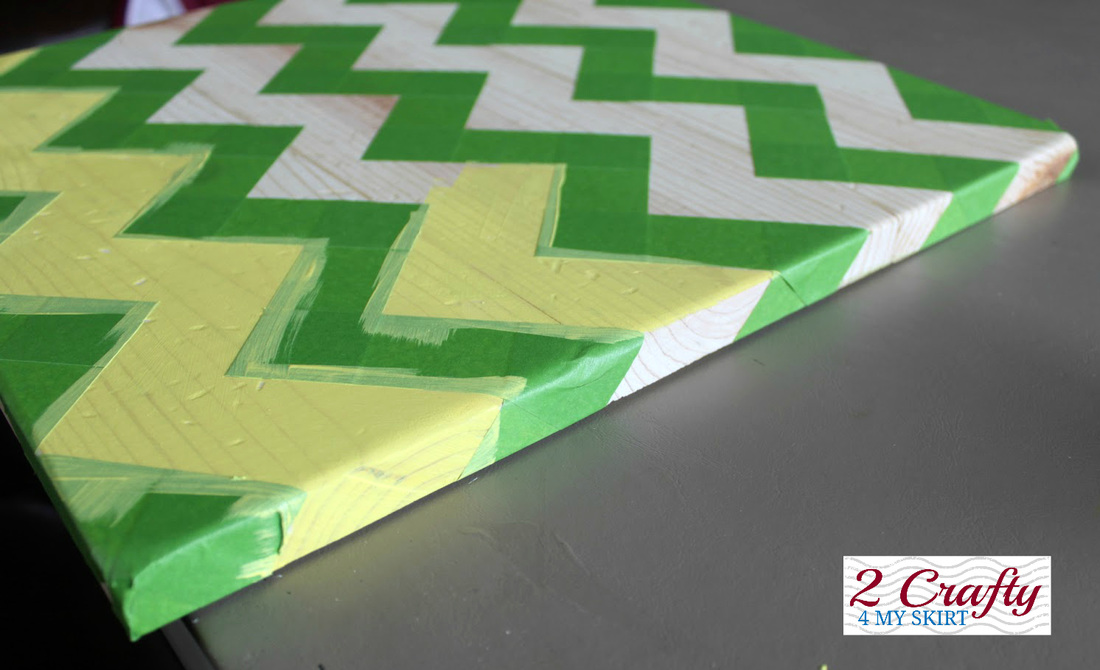
Take your tape off soon after painting, before it dries. While the paint is still a little wet you will be able to use your fingernail or razor blade to scrap off any paint that may have bled through the tape. Though you should not have much if any.
 |  |
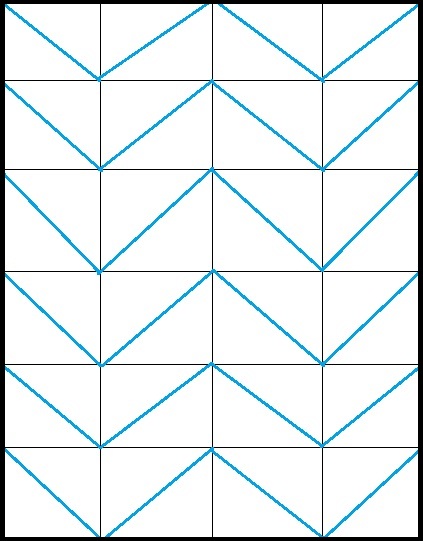
Now you know how to tape off your own Chevron for a cute sign like this! Use a Cricut or Silhouette to make a stencil for painting on your letters.
Thanks for stopping by my site!
Make sure you check out my SHOP while your here!
Make sure you check out my SHOP while your here!