
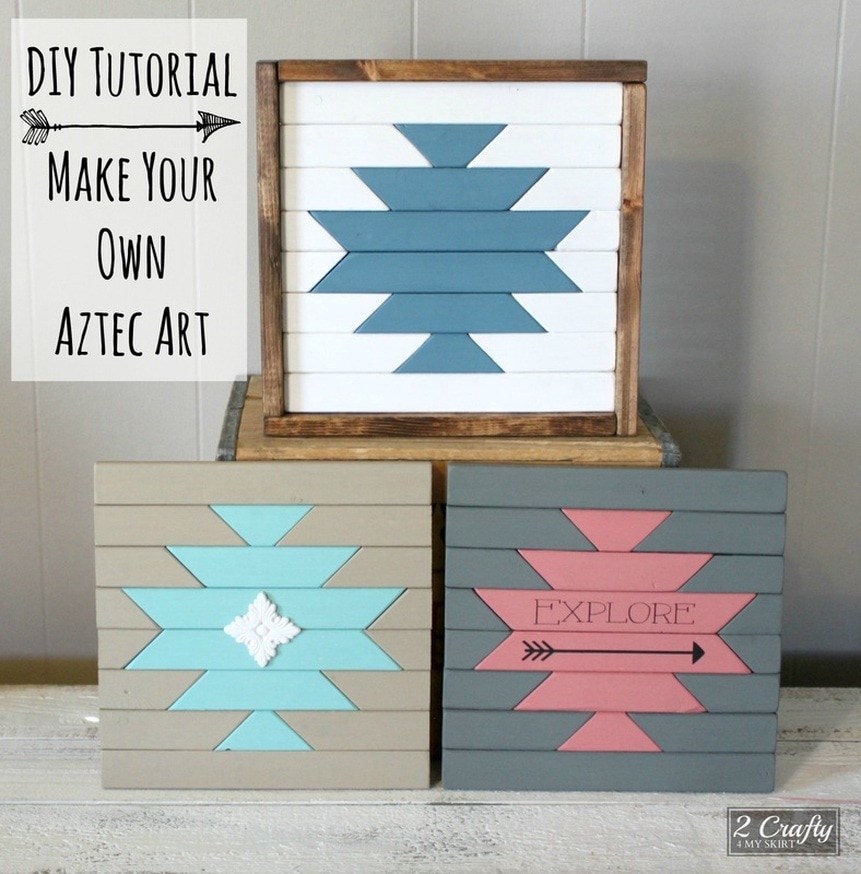
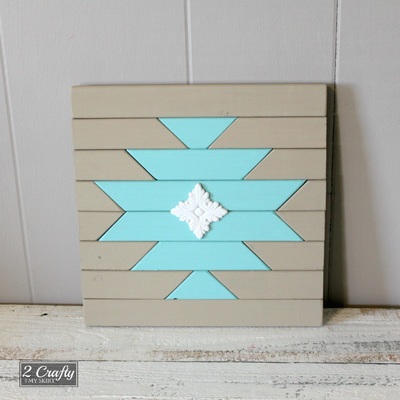
Did you see my segment on Fresh Living today? Here is the full tutorial for these Aztec Art signs!
Supplies Needed:
2 - 1x2 Pineboards
1 - 11 1/4" square piece of 1/4 MDF or Plywood
3/4" Finish Nails
Paint and/or Stain
Embellishments (Optional)
Wood Glue (For Embellishments ONLY)
Tools Needed:
Carpenter Square
Miter Saw or Circular Saw
Tape Meausure
Sander and/or Sand Paper
Finish Nailer
2 - 1x2 Pineboards
1 - 11 1/4" square piece of 1/4 MDF or Plywood
3/4" Finish Nails
Paint and/or Stain
Embellishments (Optional)
Wood Glue (For Embellishments ONLY)
Tools Needed:
Carpenter Square
Miter Saw or Circular Saw
Tape Meausure
Sander and/or Sand Paper
Finish Nailer
Before we get started I want you to know that these signs are available for purchase in my shop.
I would be happy to do the building for you!
Click any of these to order.
I would be happy to do the building for you!
Click any of these to order.
Also check out my entire Handmade Shop!
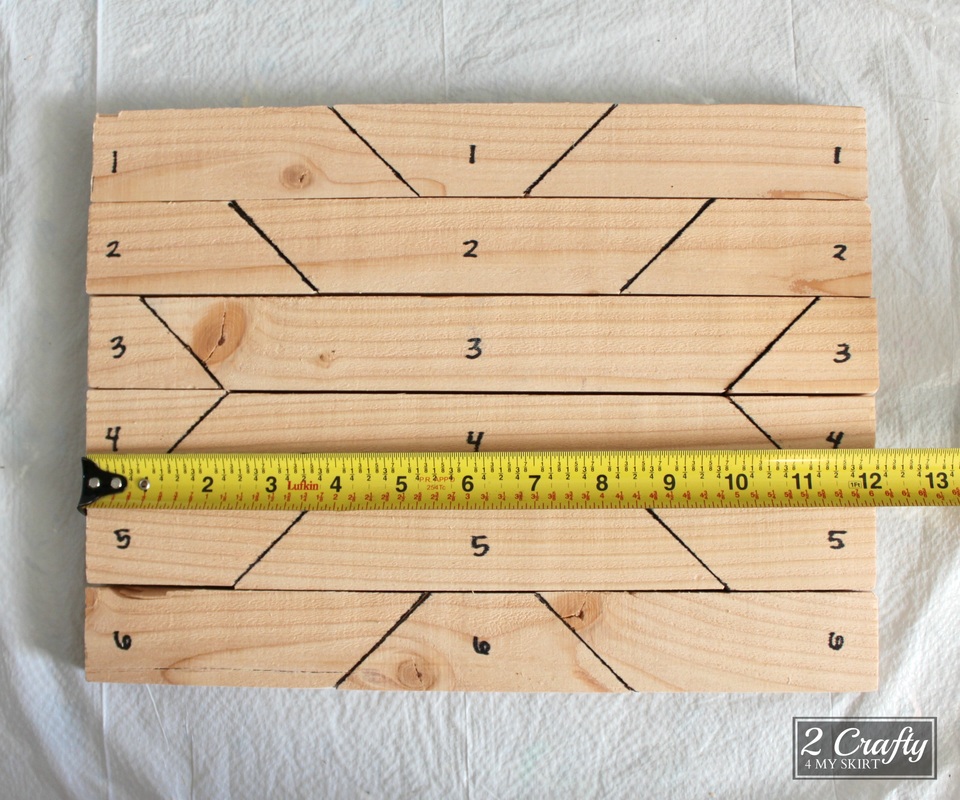
Start by cutting your 1x2 boards. You will need 6 pieces cut at 12.5". Line all of your boards up together like so.
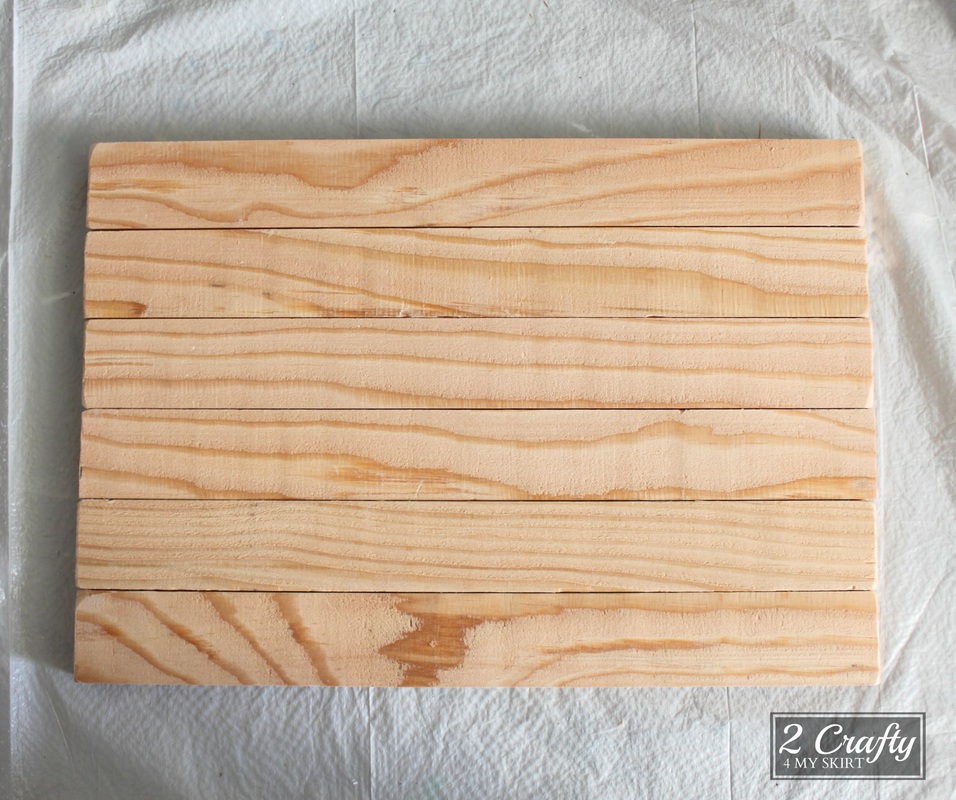
Tip: 1x2 boards are all basically the same BUT some of them have rounded edges, some have sharp edges, some are more smooth, and some have more of a grain feel to them. It doesn't really matter which ones you get, just make sure that the two you pick are the same as each other.
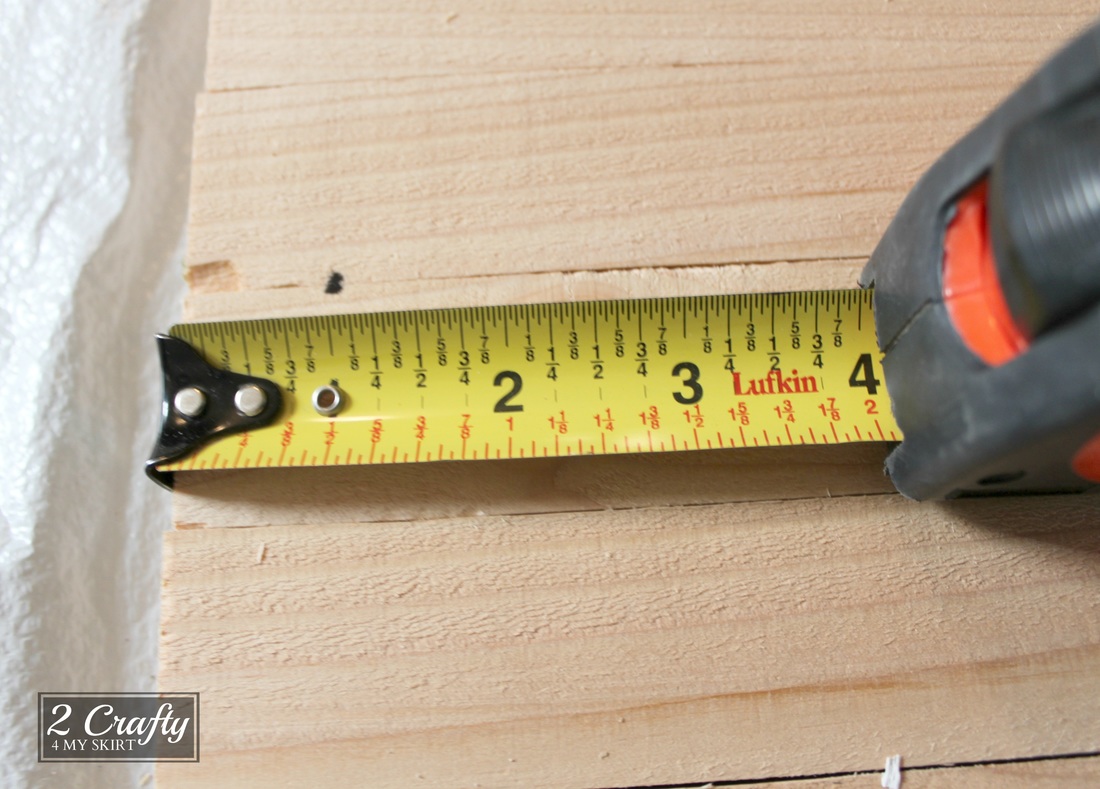
On the center two boards measure over 1" from the edge. Make a mark that reaches across both boards. Do this on each side.
On the center two boards measure over 1" from the edge. Make a mark that reaches across both boards. Do this on each side.
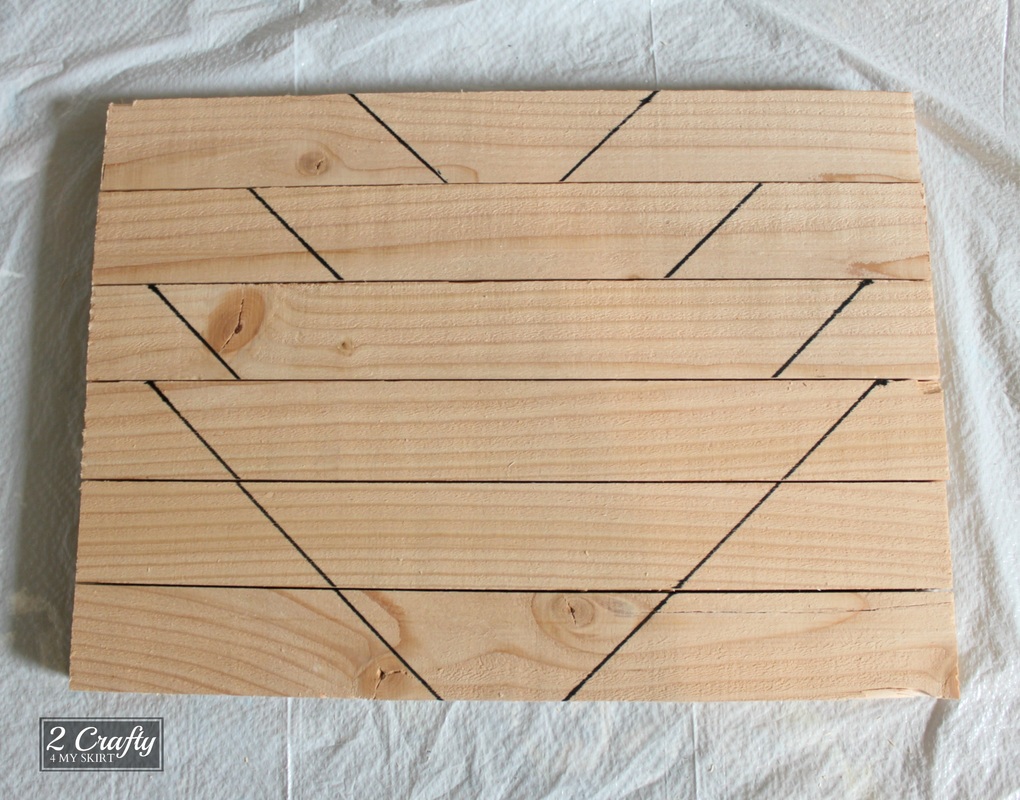
With a Carpenter Square line up with your marks and draw a line at a 45 degree angle across the boards as shown here. Note that the lines should not come to a point on the top and bottom.
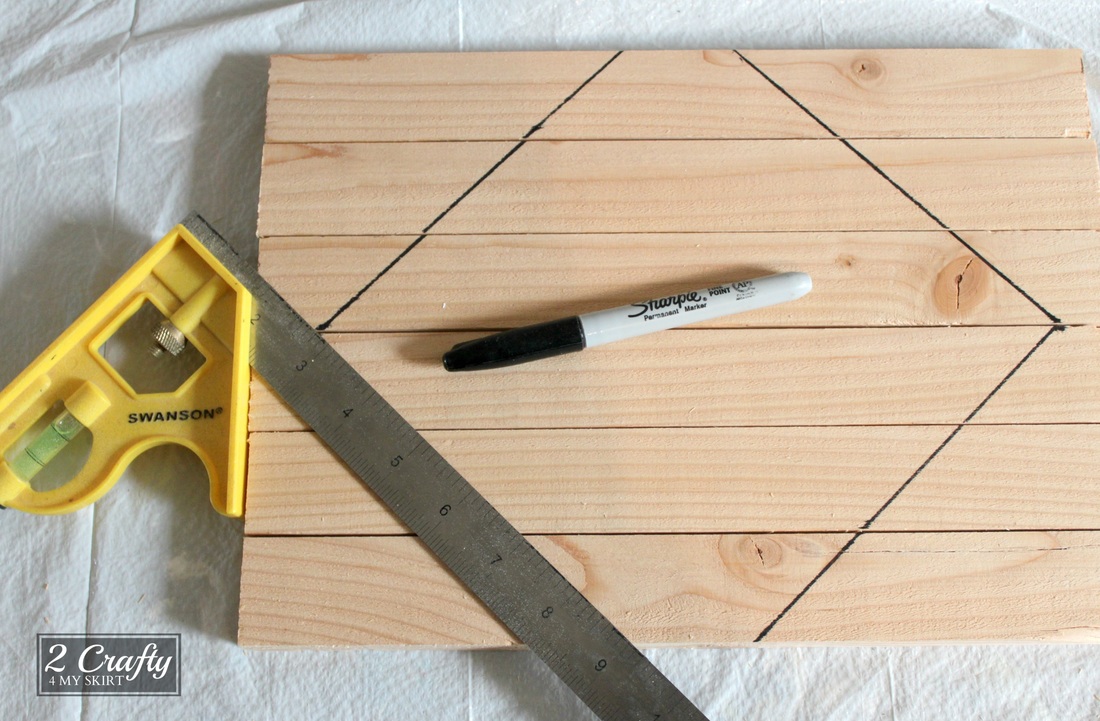
You may be asking why you are drawing your lines like this. It is much faster than measuring and marking each one individually. You will just invert each piece when you are done marking. See how easy that was to make the Aztec pattern?
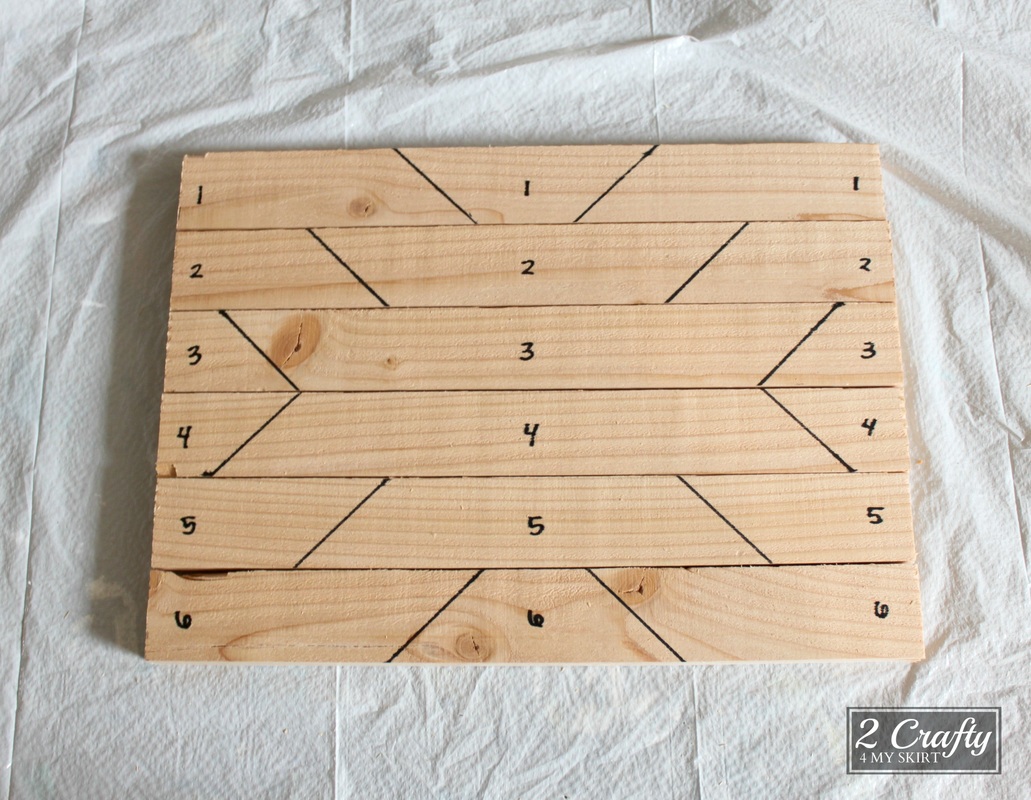
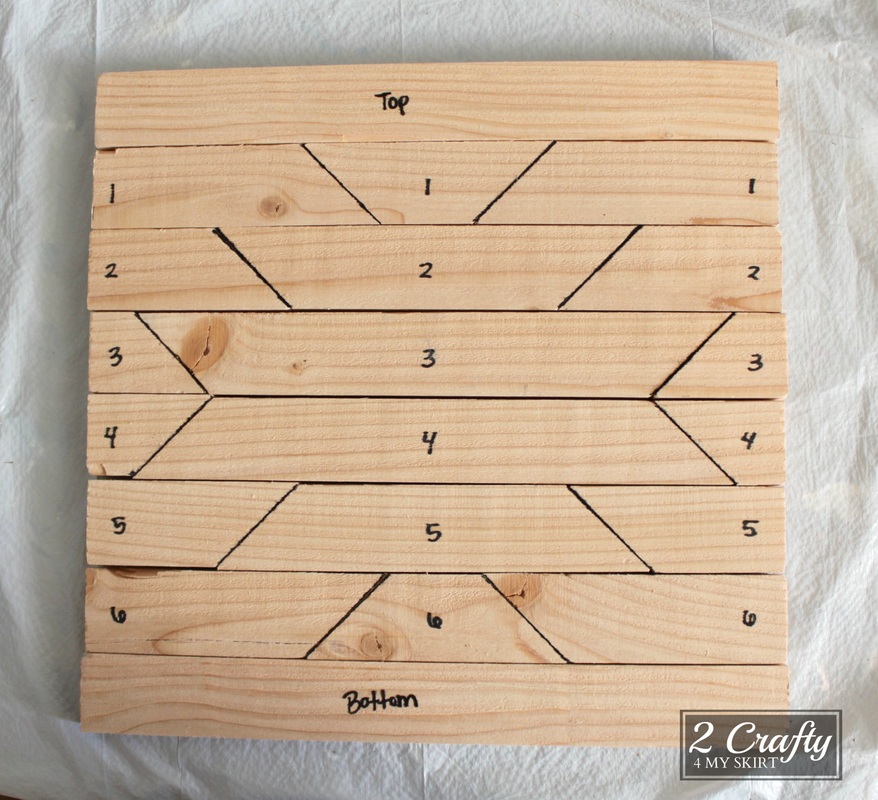
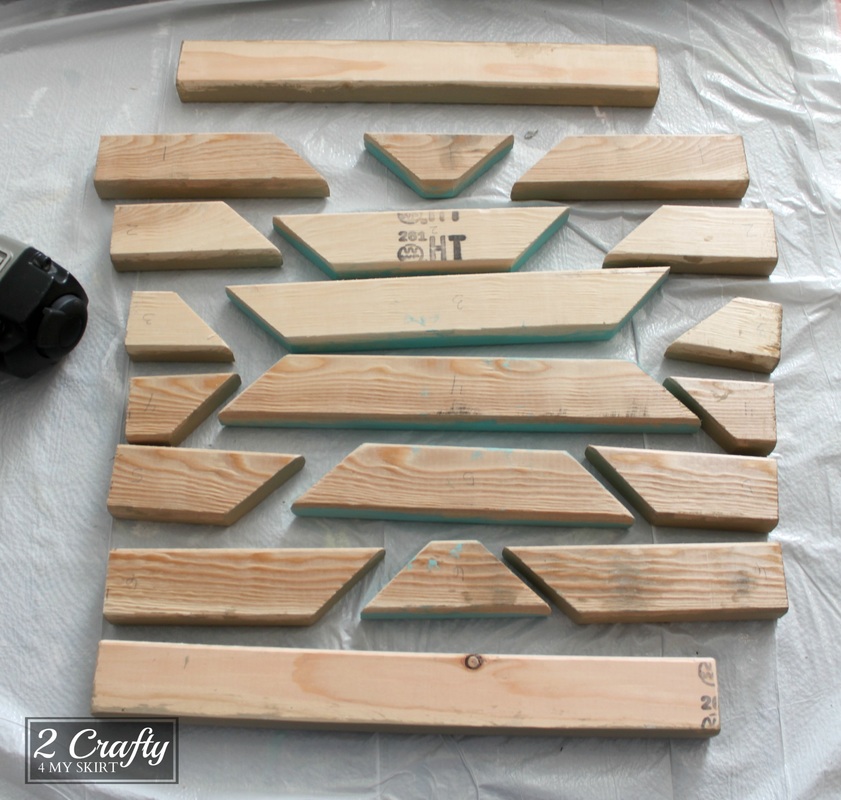
I like to number each piece before cutting it. This makes it easy to get all of the pieces back together in the right spot.
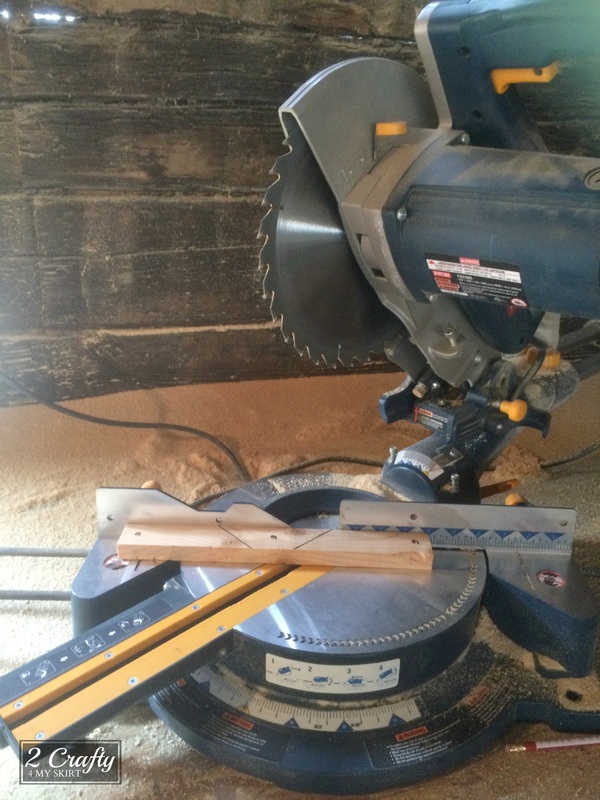
Now you are ready to cut your angles. The best way to do this is with a miter saw that can be set at 45 degrees. However with as small of a cut as it is, you can also use a circular saw if that is what you have available.
And this my friends is why I number the pieces.
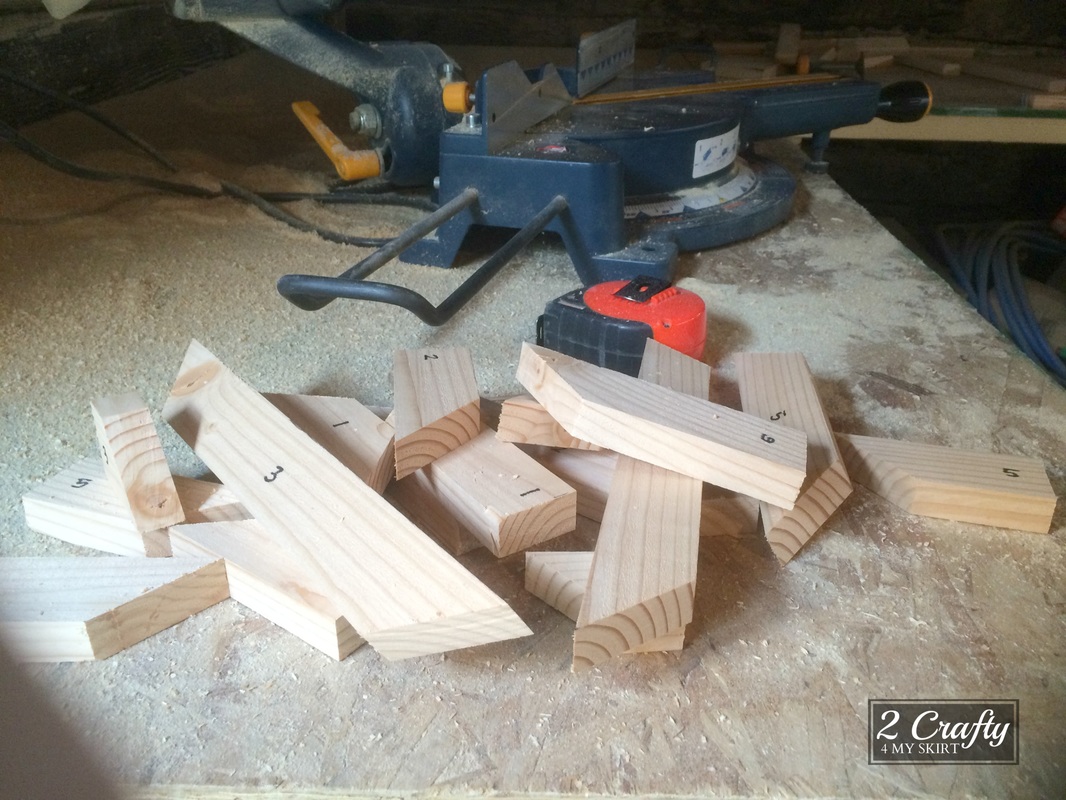
You may have been wondering about the top and bottom boards. (The ones with no angle cuts.) This is the point when you want to cut those. Each cut of your board should have taken out about 1/8". Put your pieces together and measure across. It should be about 12 1/4". Now cut two 1x2 boards to the size you measure.
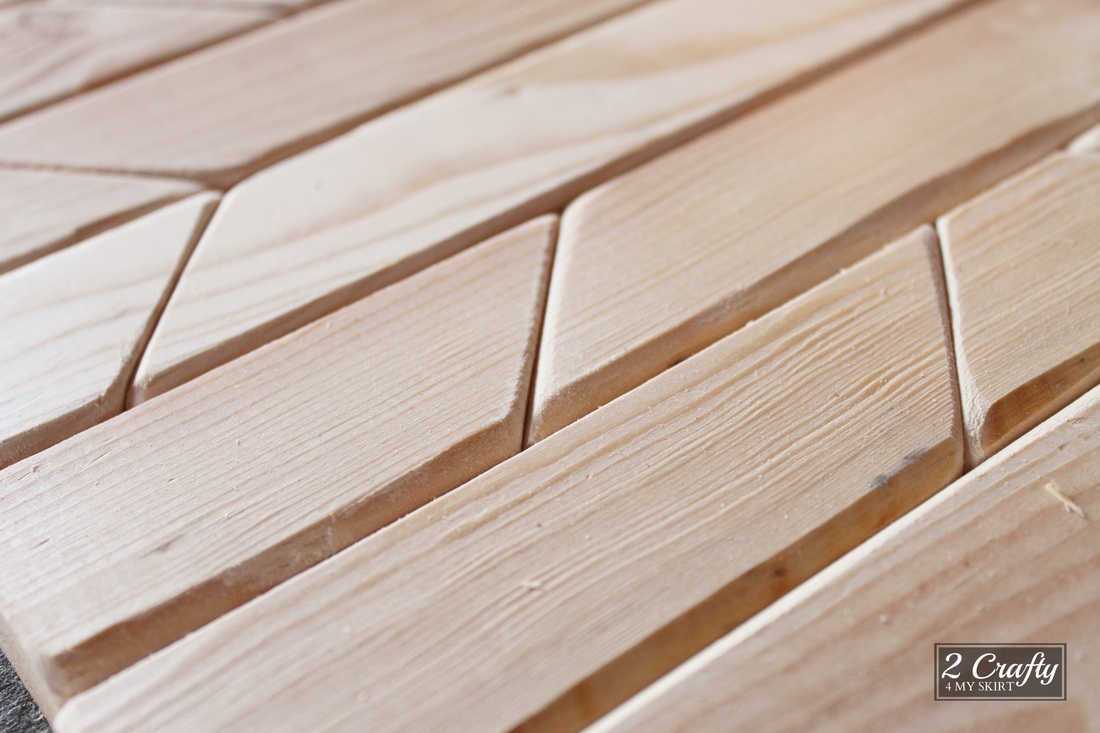
Next you will want to round off ALL of the edges of each board (on the "front" side) with a sander. Not only will this remove the rough edges created by your saw, but it with also add more dimension to your sign. You will want to use a course grit sand paper. I use 60 grit.

You can see here how rounding off the edges added a lot more dimension to the shape of my sign.
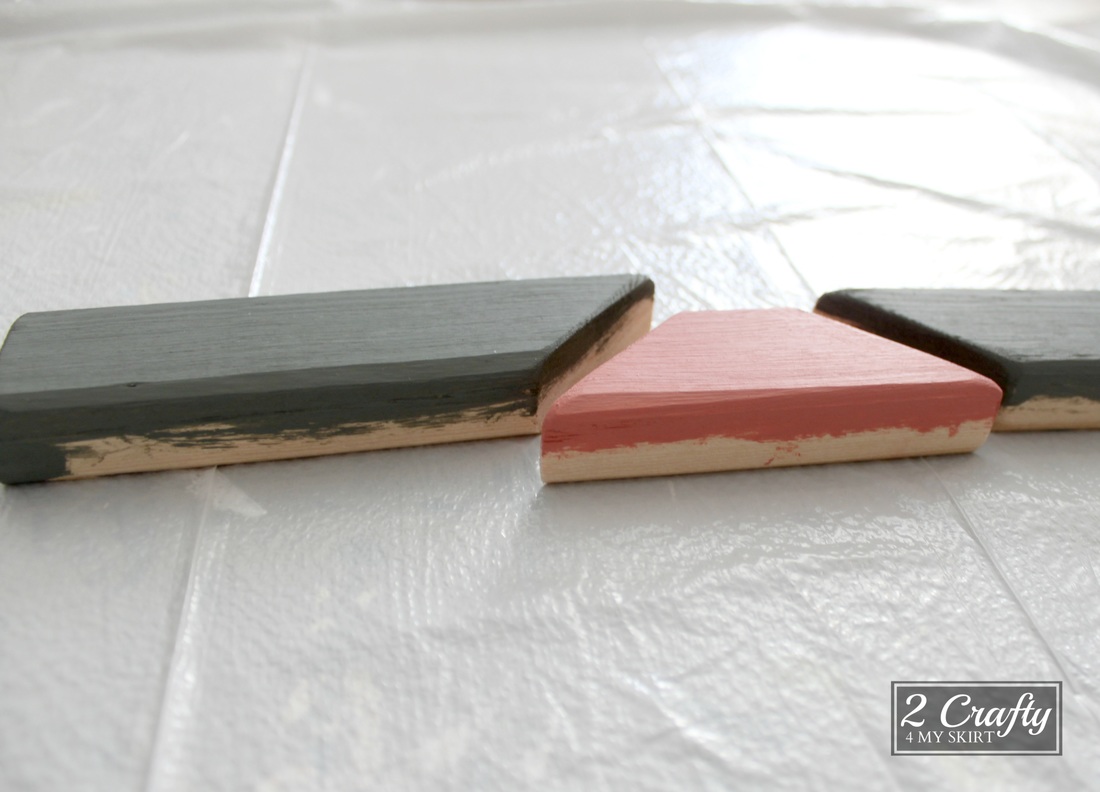
Now you get to paint! You can use craft paint, latex, spray paint - whatever you have or prefer. Whenever I say spray paint people give me a funny look.
Like ... "I hate that stuff!" "It never covers very well." "It always leaves drip marks!" If this is how you feel about spray paint - you are using the wrong kind! The only spray paint I have found that I like is Rustoleum 2X coverage. And it is AWESOME! I use it almost every day! However, on this sign you can see I used craft paint. Make sure you paint down around the sides, and all of the outside edges.
Like ... "I hate that stuff!" "It never covers very well." "It always leaves drip marks!" If this is how you feel about spray paint - you are using the wrong kind! The only spray paint I have found that I like is Rustoleum 2X coverage. And it is AWESOME! I use it almost every day! However, on this sign you can see I used craft paint. Make sure you paint down around the sides, and all of the outside edges.
Once you have it painted, you are ready to put together your puzzle back together so you can nail it all in place.
Or you can find yourself a cute little 5 year old who loves to put puzzles together.
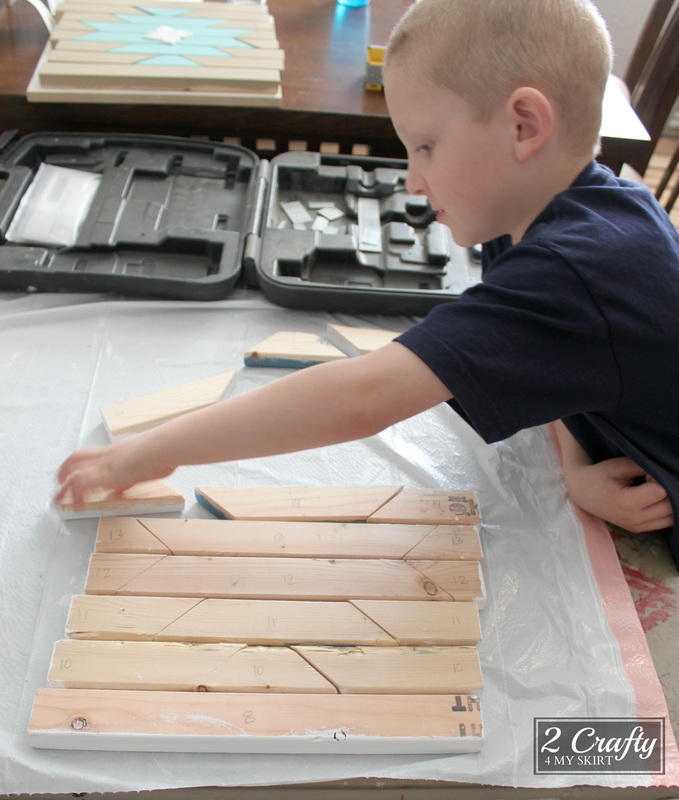
Line your pieces up together. Make sure there are no gaps. Beware that when you push in from the sides, the pieces will likely slide past each other.
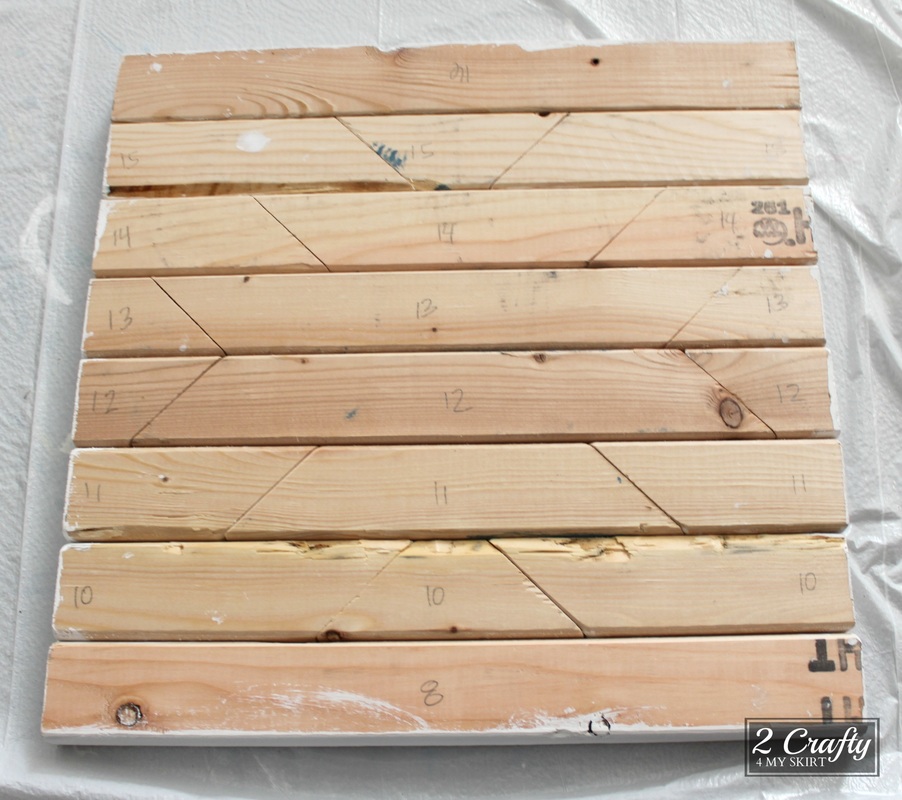
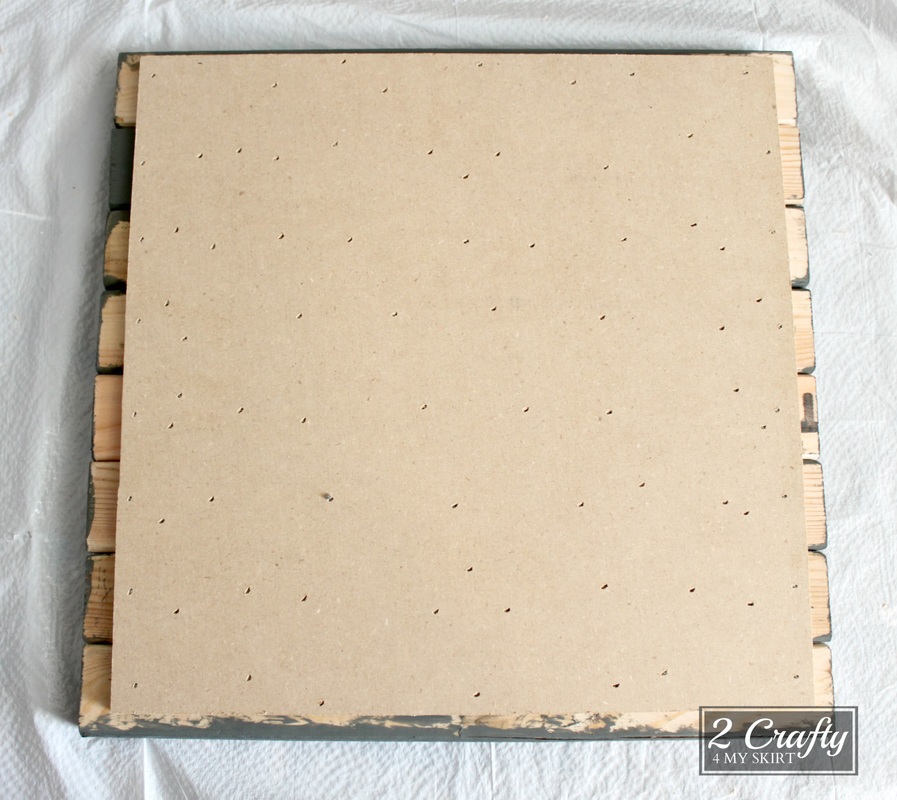
Once you have your pieces all lined up, carefully place your piece of MDF or plywood on top.
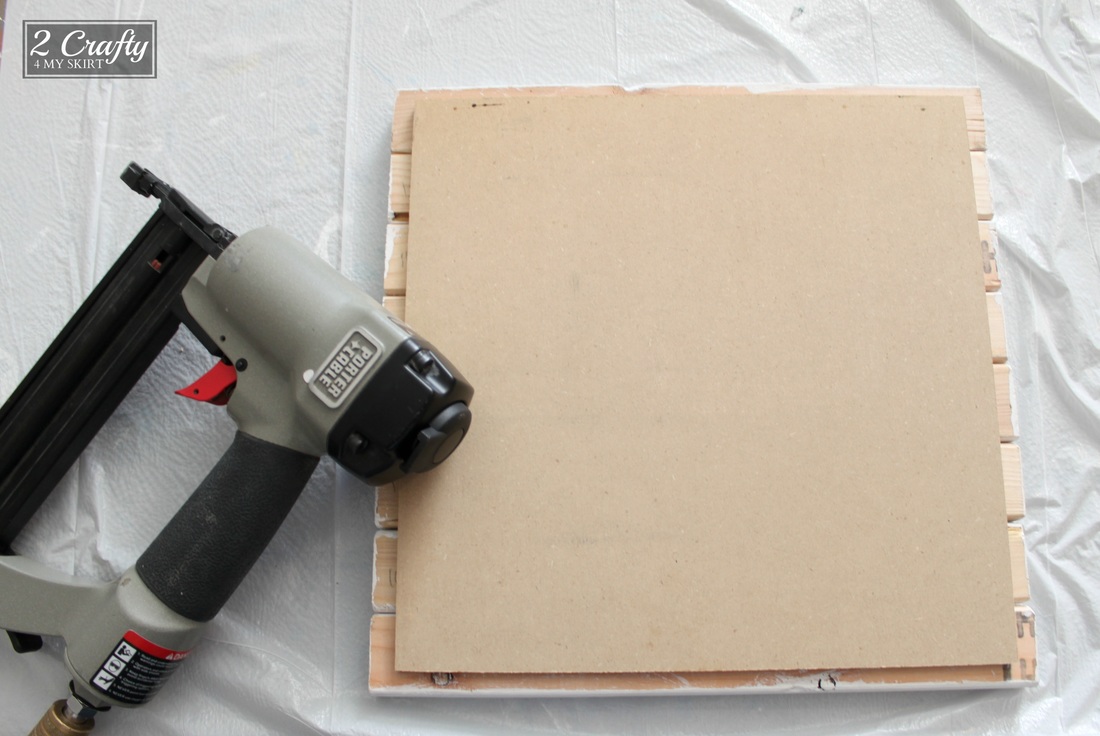
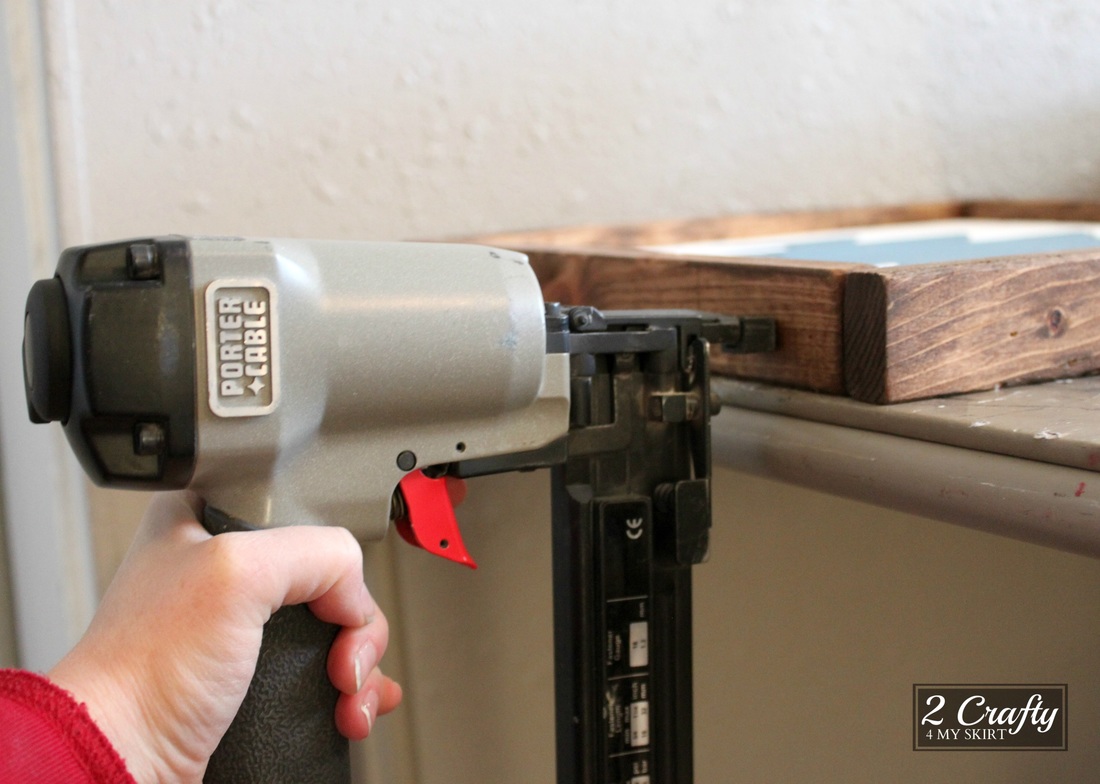
Using 3/4" nails, start by putting one nail in each corner. The air pressure of the nail gun may cause the pieces to bounce ever so slightly. After each of the first few nails check to make sure no pieces have bounced out of place.
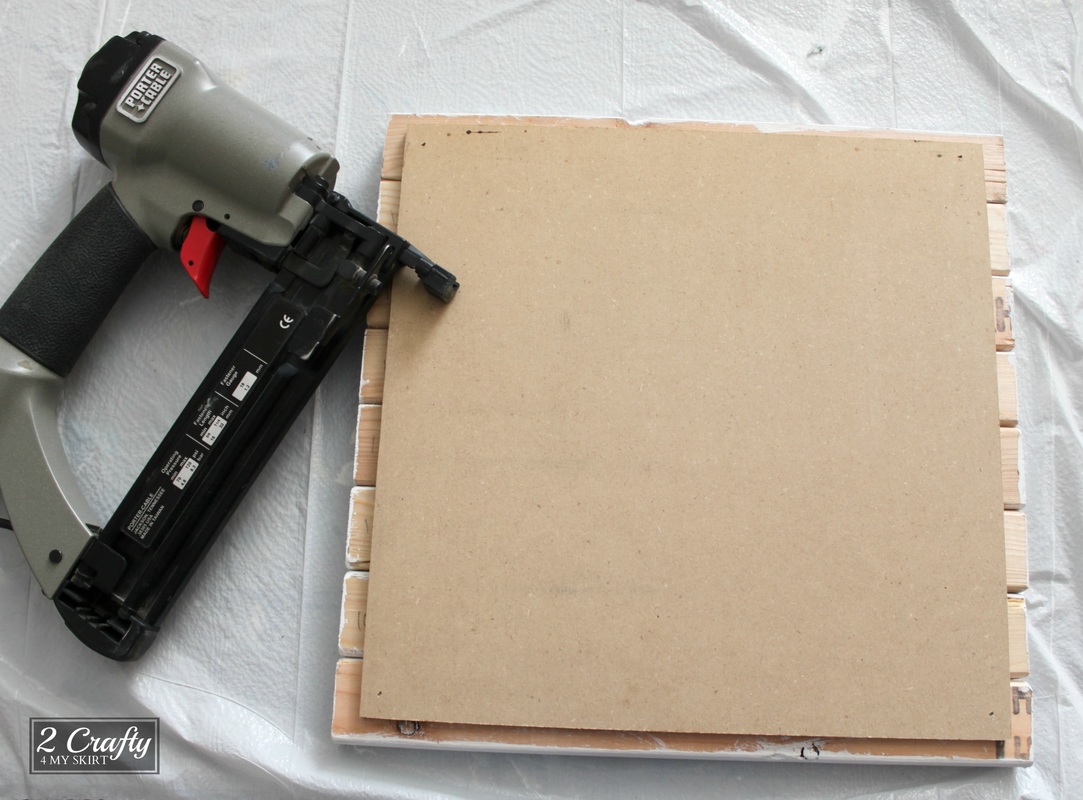
Next nail up the sides, and then go crazy nailing all over the back. Try to visualize where each piece is and get at least 3 nails in every piece. When you are done just pick it up and try to wiggle each piece. If any piece has a wiggle flip it back over and add a nail.
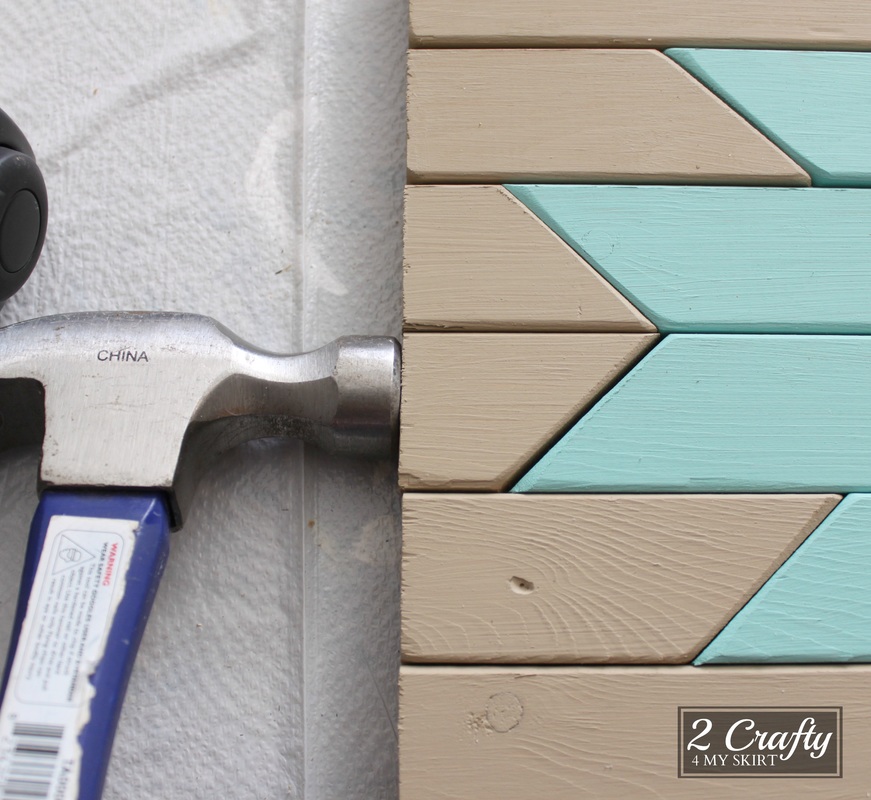
Sometimes as hard as you try one of your pieces might bounce a little when you are nailing it together. Especially these little tiny ones. See that gap?

The good news is that finish nails bend quite easily (when we want them to.) If you have this happen just take a hammer and lightly tap the side of the board until it is in place! Easy fix!
You can call it quits at this point. Or here are three different ideas for finishing yours out...
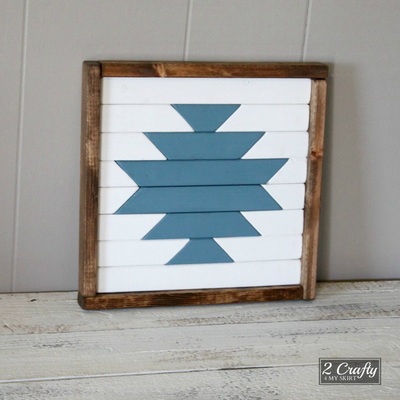
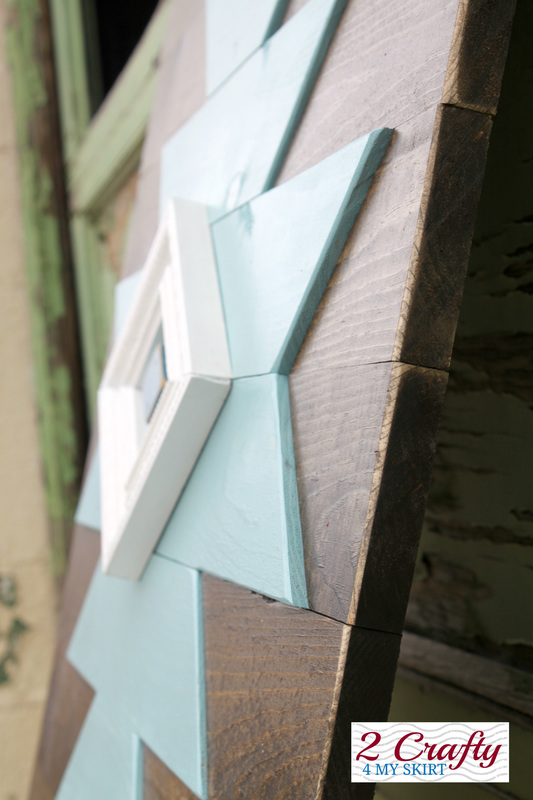
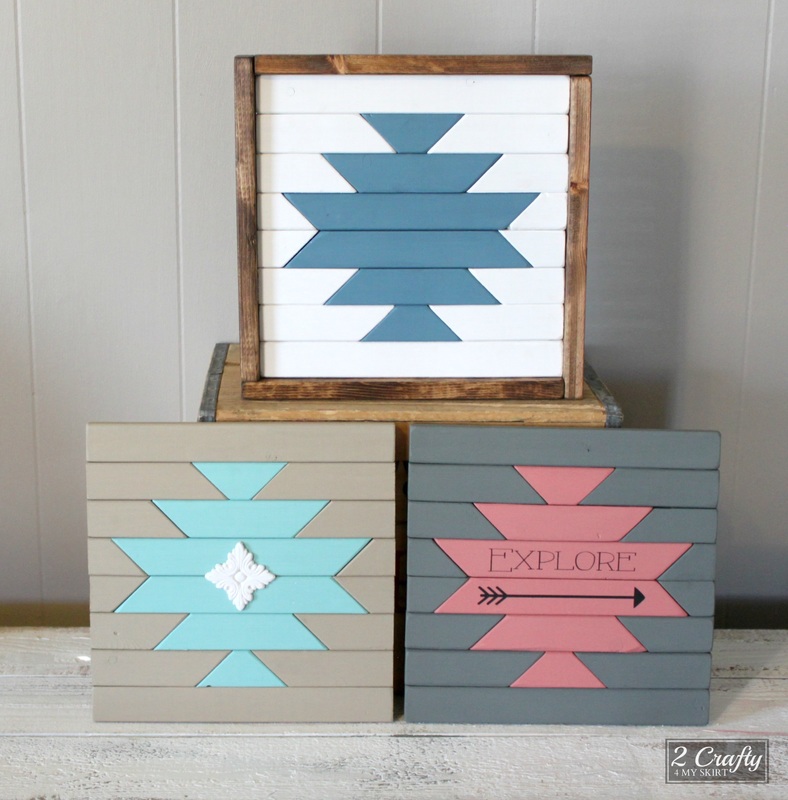
Add a frame around the outside.
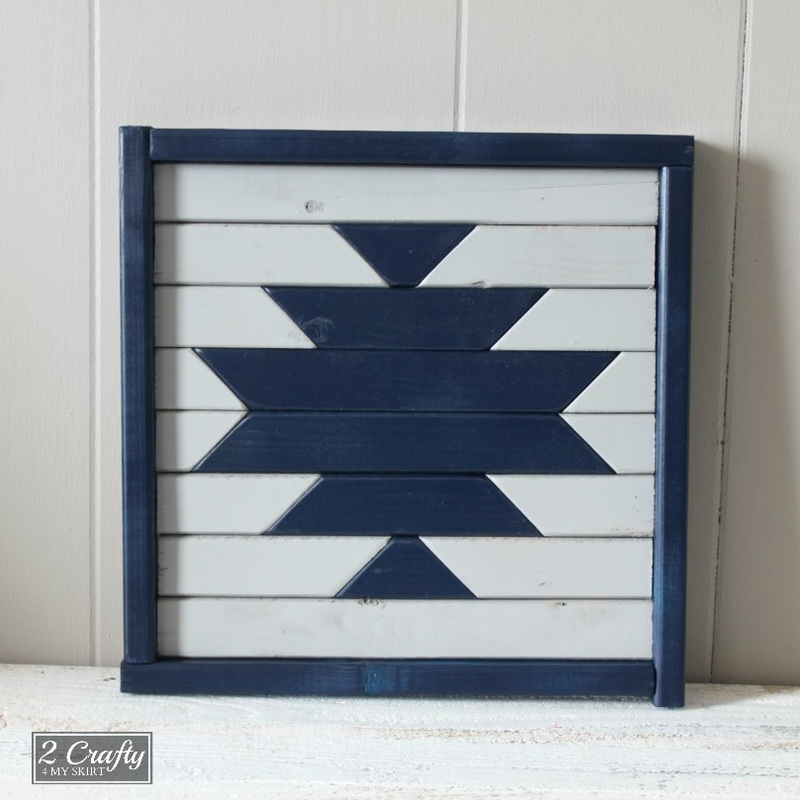
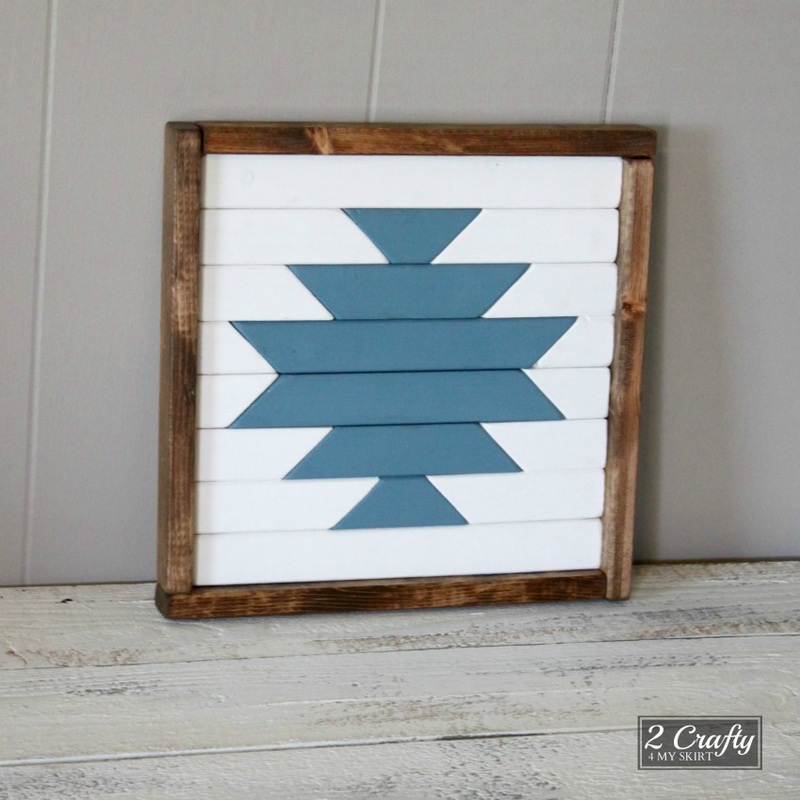
To do this measure all sides of your sign. Cut a 1x2 for each side that is 3/4" longer than the dimension measured. Paint or stain them to match. Use your finish nailer (with 1 1/4" nails) to attach them from the side. They will fit in an overlapping pattern (as shown above).
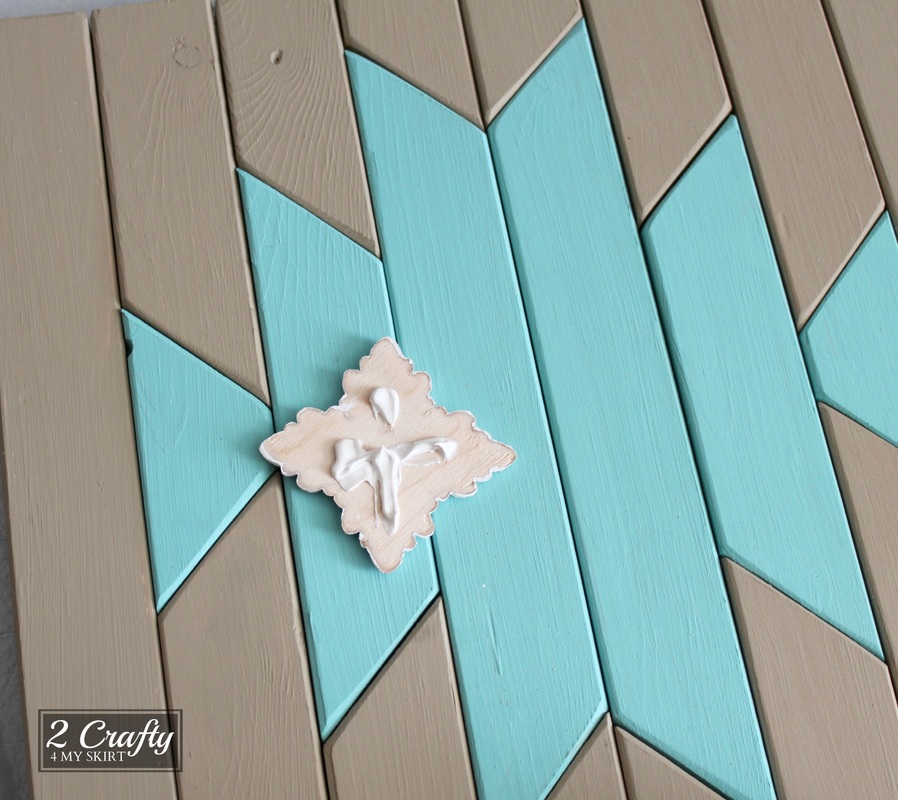
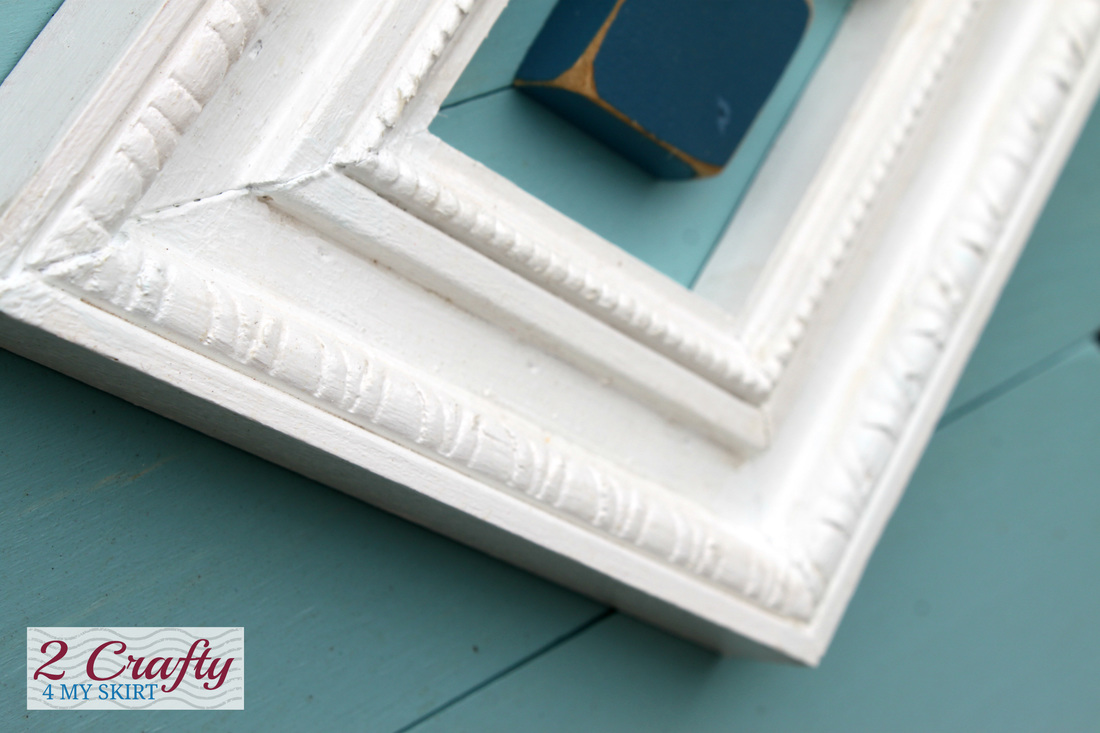
You can also add embellishments or appliques.
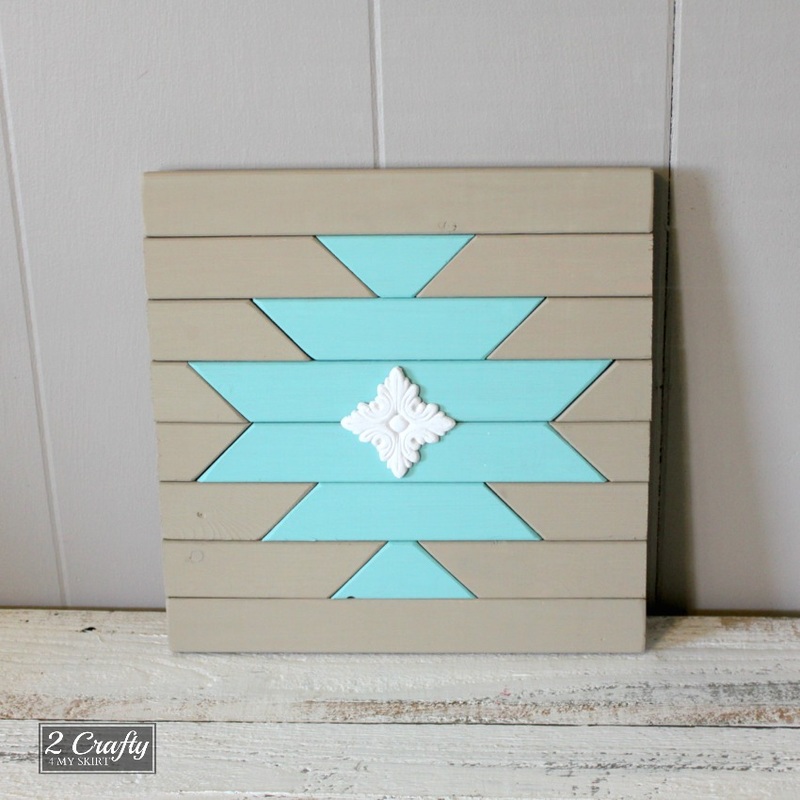
To add a small applique like this one, I use wood glue or liquid nails. Keep in mind that the glue will squish out when you put it on. Put on a minimal amount of glue and keep it near the center. The glue will take a few hours to dry. You will be able to wiggle it around a bit to get it in just the right spot.
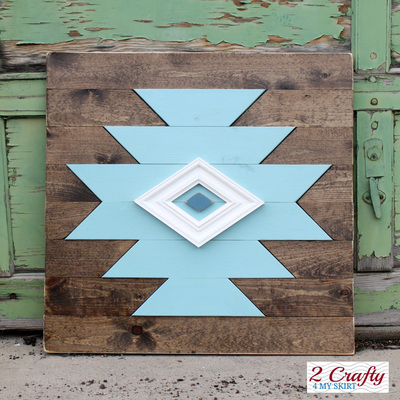
Here you can see a larger version of this sign that I have made. This one was made with the same basic steps. I just used 1x4 pineboards instead.

I also placed additional 1/4" pieces of MDF behind the middle boards before adding my backer board. This made the design stand out from the sign.
I added some decorative molding and a triangle piece to the center with my finish nailer.
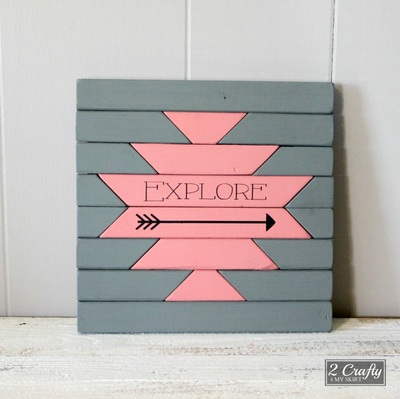
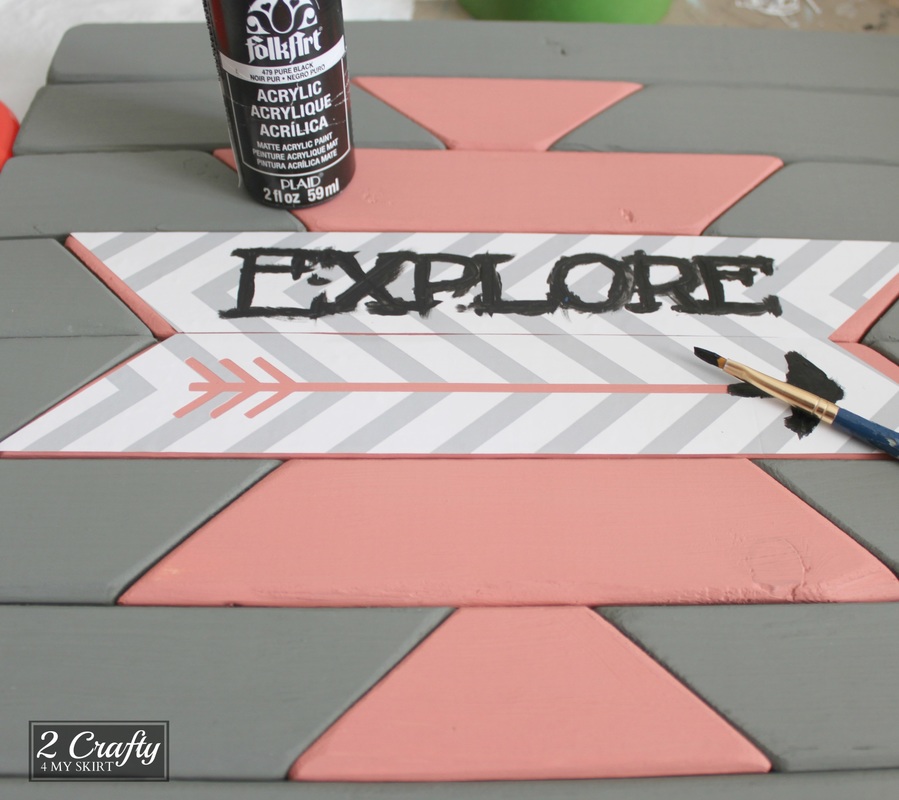
Another option is to add some words to your sign.

I did this by cutting my own stencil. (You could have vinyl made, or free hand it if your awesome like that. - I'm definitely not that awesome.) For stenciling I have found that the best paint is Folk Art. It's thicker than any of the other paints I have tried, so it doesn't really leak through your stencil.
There you have it! Are you going to make one? I want to see it if you do! Tag me on Instagram @2crafty4myskirt! What ideas do you have for finishing out one of these?
If you love this sign and tutorial Please come follow me on Instagram @2crafty4myskirt.
And don't forget that you can custom order this sign in my shop just how you want it!
And don't forget that you can custom order this sign in my shop just how you want it!
To stay up to date on all my Sales, Giveaways, Tutorials, and New Products Join my Mailing List! I typically send only 1-2 emails a month so you don't need to worry about me clogging up your inbox. And you get a FREE print when you sign up!